
Who is this for?
✓ Teachers.
✓ Requires a Kami paid plan.
To complete the steps in this article, the Kami external tool integration must be installed in Agilix Buzz. For further assistance, refer to our guide for installing the Kami external tool integration in Agilix Buzz.
How to create a Kami assignment in Agilix Buzz
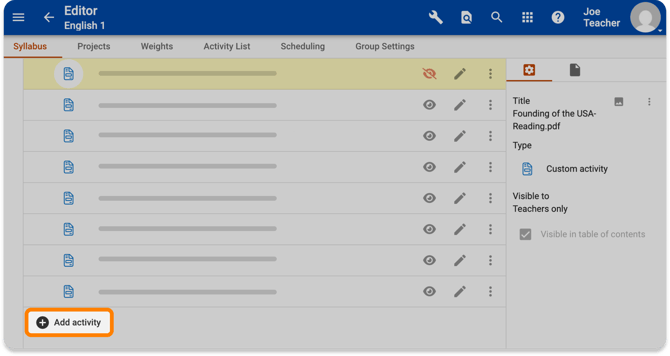
1. Navigate to the desired course, then open the left side panel and select Editor.-png.png?width=670&height=422&name=Agilix_CreateAssignment%20(1)-png.png)
2. Under the Syllabus tab, select Add activity.
3. In the Add activity window that opens, find the Kami external tool and select Add.
📝 The Kami external tool integration must first be installed by an Agilix Buzz admin in order for it to appear as an option in the activity creation window. Refer to our guide for installing the Kami external tool integration in Agilix Buzz.
-png.png?width=670&height=367&name=Agilix_CreateAssignment%20(2)-png.png)
4. In the Kami window that opens, you can attach a file from your Google Drive, OneDrive, the Kami Library, or upload from your computer.
After uploading your file, you can also enable Assessment Mode and configure optional Feature Control. When you're finished, select Attach.
-png.png?width=670&height=453&name=Agilix_CreateAssignment%20(4)-png.png)
-png.png?width=670&height=395&name=Agilix_CreateAssignment%20(3)-png.png)