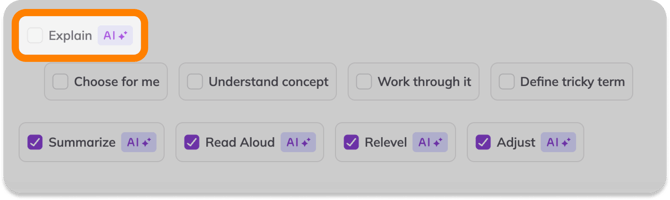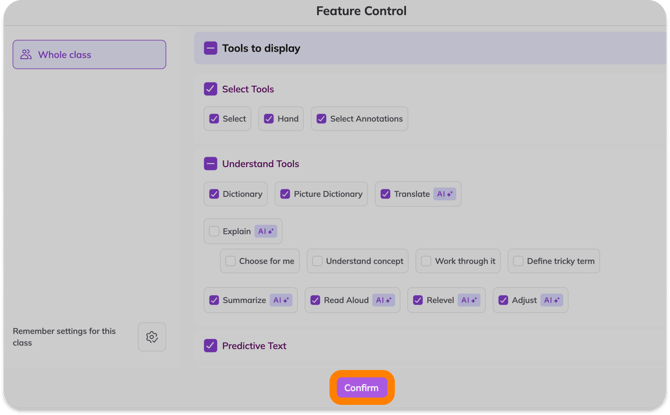
Who can use this?
✓ Students.
✓ Requires a Kami paid plan.
One of several Understand tools available in Kami, designed to improve comprehension, accessibility, and independence for all learners.
What is the Explain tool?
The Explain tool generates a clear explanation of selected text, images, charts, graphs, or diagrams in a document. It rephrases ideas in accessible language and adds helpful context, much like a teacher breaking down a challenging concept step by step.
With the latest update, Explain now includes expanded personalization settings directly inside the modal. Plus, Teachers have full control of what students can use.
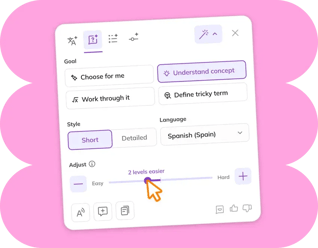
Students can:
-
Set a learning goal for the type of explanation they need
-
Choose the style of response
-
Adjust the reading level
-
Translate the explanation into another language
All without leaving their workflow. This creates fewer clicks, better flow, and more consistent scaffolding when students need support most.
How to use the Explain tool
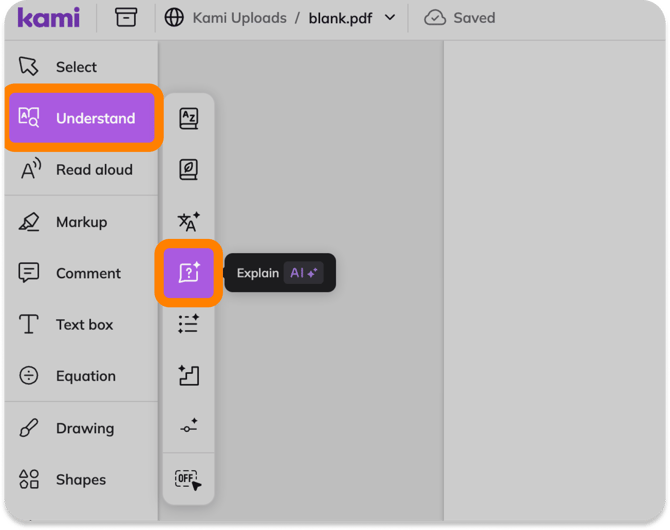
2. Highlight text in your document, or toggle on Area Selection (located at the bottom of the Understand tools menu) to select images, diagrams, or larger sections of content.
The explanation will appear automatically in the modal.
-png.png?width=670&height=330&name=Explain_9%20(6)-png.png)
⚠️ If you cannot highlight text in your document, you may need to run the Text Recognition tool. This embeds the text in your document so you can select it.
Personalizing your explanation
The updated Explain modal includes a new expandable settings section.
-png.png?width=670&height=421&name=Explain_9%20(4)-png.png)
1. Goal
Choose a learning goal for the kind of support you want:
-
Choose for me: Kami automatically selects the most helpful explanation style based on the content.
-
Understand concept: Focuses on explaining the overall idea clearly.
-
Work through it: Breaks down the content step by step.
-
Define tricky term: Focuses on clarifying difficult vocabulary or phrases.
2. Style
Select a style to determine how detailed you want the response to be:
-
Short: A concise explanation.
-
Detailed: A more thorough breakdown with added context.
3. Language
Use the language dropdown to translate the explanation into another supported language.
📝 These language and level settings are specific to Explain and do not change the standalone Translate or Adjust tools.
4. Adjust level
Use the level slider to make the explanation easier or more complex to read.
-
Slide toward Easy for simplified language.
-
Slide toward Hard for more advanced wording.
This allows students to match the explanation to their reading level or learning needs.
💡The levels used in this tool are defined using AI to target the median range of standard reading scores for each grade. This ensures that the generated text matches the typical complexity of a student's reading level.
Other Explain options
-png.png?width=670&height=421&name=Explain_9%20(3)-png.png)
From the Explain modal, you can also:
1. Read Aloud: Have the explanation read aloud to you.
2. Create comment from response: Turn the explanation into a comment on the document.
3. Copy response to clipboard: Copy the explanation text to use elsewhere.
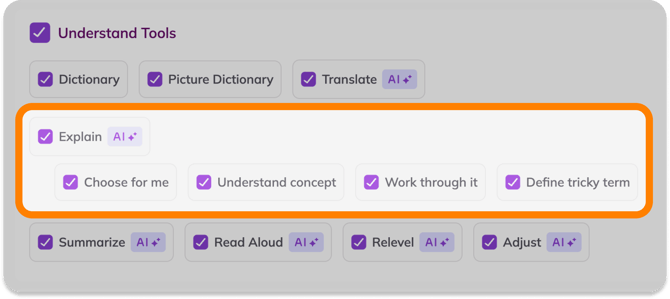
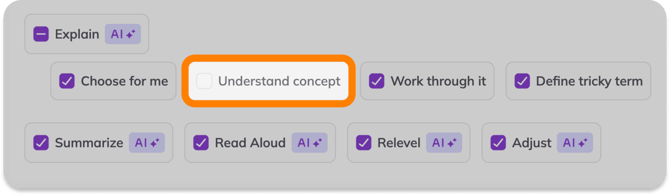
Using Feature Control with the Explain tool
How to configure Feature Control
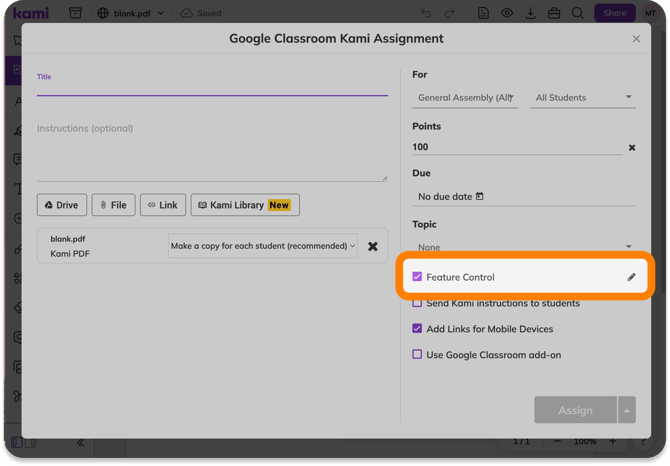
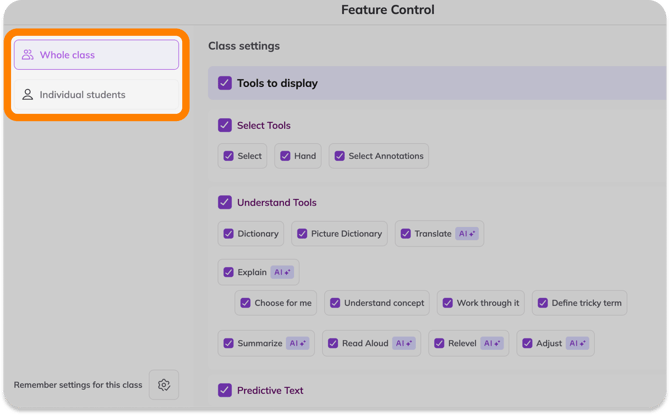
1. When creating an assignment or sharing a file from Kami, selecting the Feature Control option will open the Feature Control settings window. For more specific steps on where to find this in different LMSs, refer to the Feature Control guide.