Who can use this?
✓ Students, Teachers, and Others.
✓ This is a free tool; users on any Kami plan can use this tool.
🔒 Certain features (Paint Bucket, Ruler, Protractor, and Compass) of the Drawing tool require a Kami paid plan to use.
What is the Drawing tool?
The Drawing tool lets you unleash your creativity with freehand drawing, color fills, and smart geometry tools (including rulers, compasses, and protractors)—for pixel-perfect precision using a mouse, stylus, or your finger.
Express yourself with 100+ color options, or use the eyedropper to sample any shade.
How to use the Drawing tool
To use, simply select the Drawing tool from the Kami toolbar.
A menu bar will open with an array of options for creating your drawings. Choose from two available modes, Drawing (selected by default) or Paint Bucket. Learn more about each option available in the Drawing toolbar below:
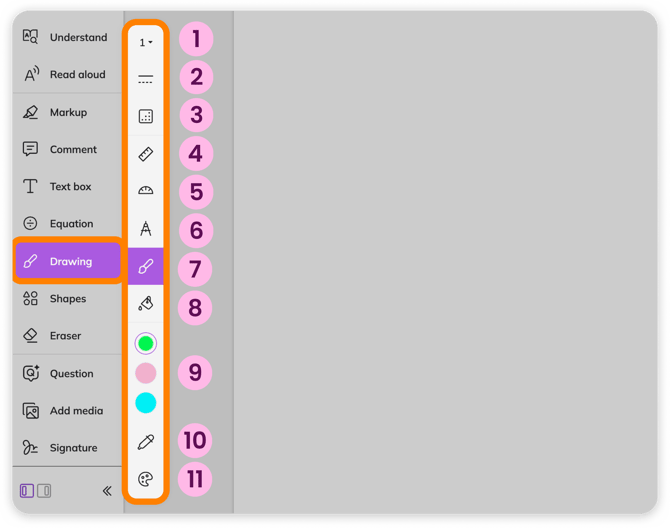
1. Stroke thickness — Adjust the size of your drawing stroke.
2. Stroke type — Choose from a solid or dashed line for your stroke.
3. Transparency — Adjust the opacity of your stroke on a slider.
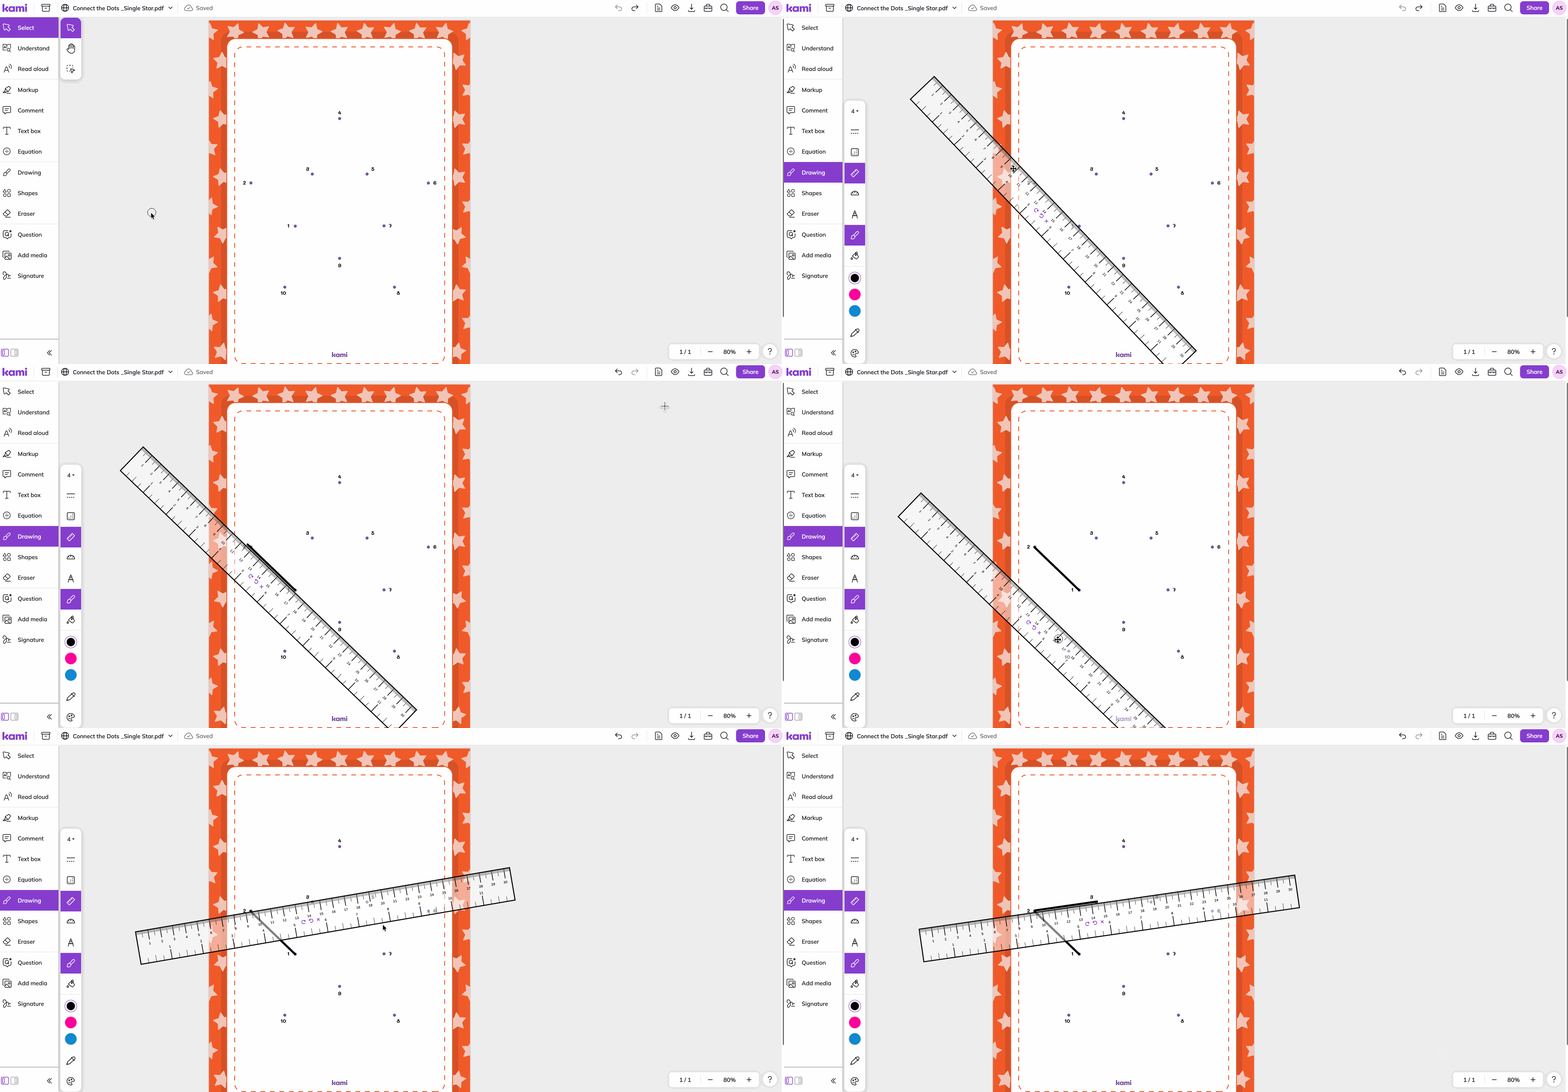
4. Ruler — Use a drawing assist ruler tool for measurements and perfectly straight lines every time. Learn more in the Drawing Assist tools section below.
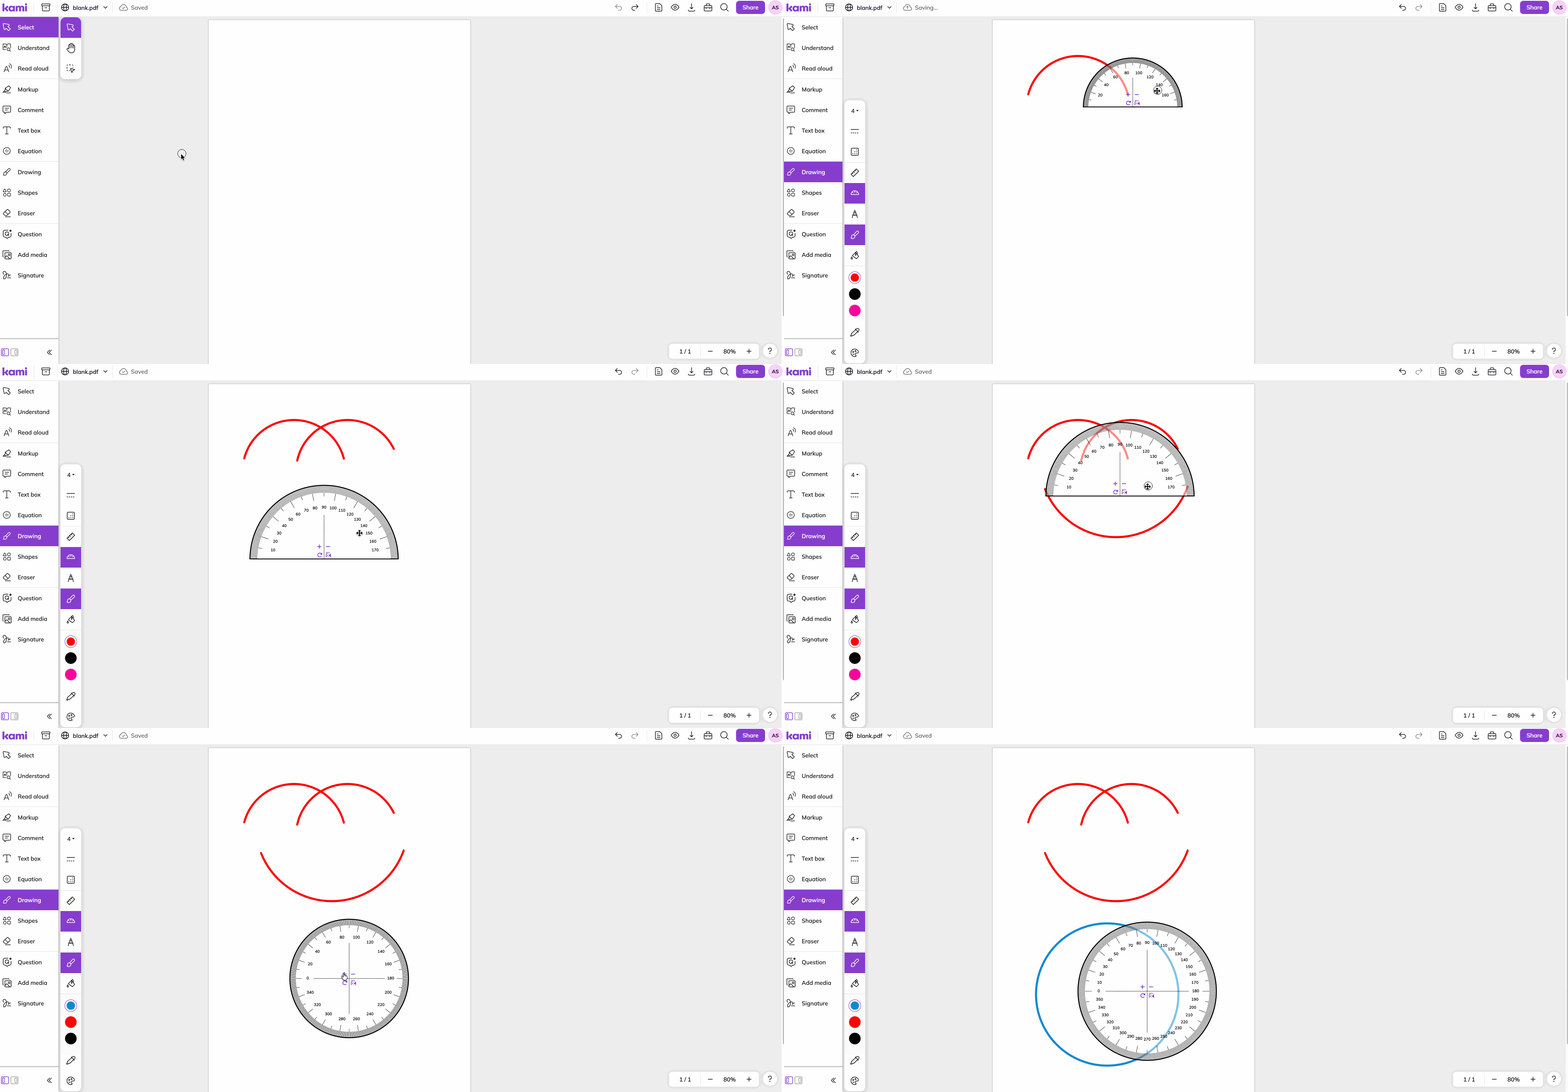
5. Protractor — Use a 180- or 360-degree drawing assist protractor tool for rounded lines or circles. Learn more in the Drawing Assist tools section below.
6. Compass — Use an adjustable drawing assist compass for rounded lines or circles. Learn more in the Drawing Assist tools section below.
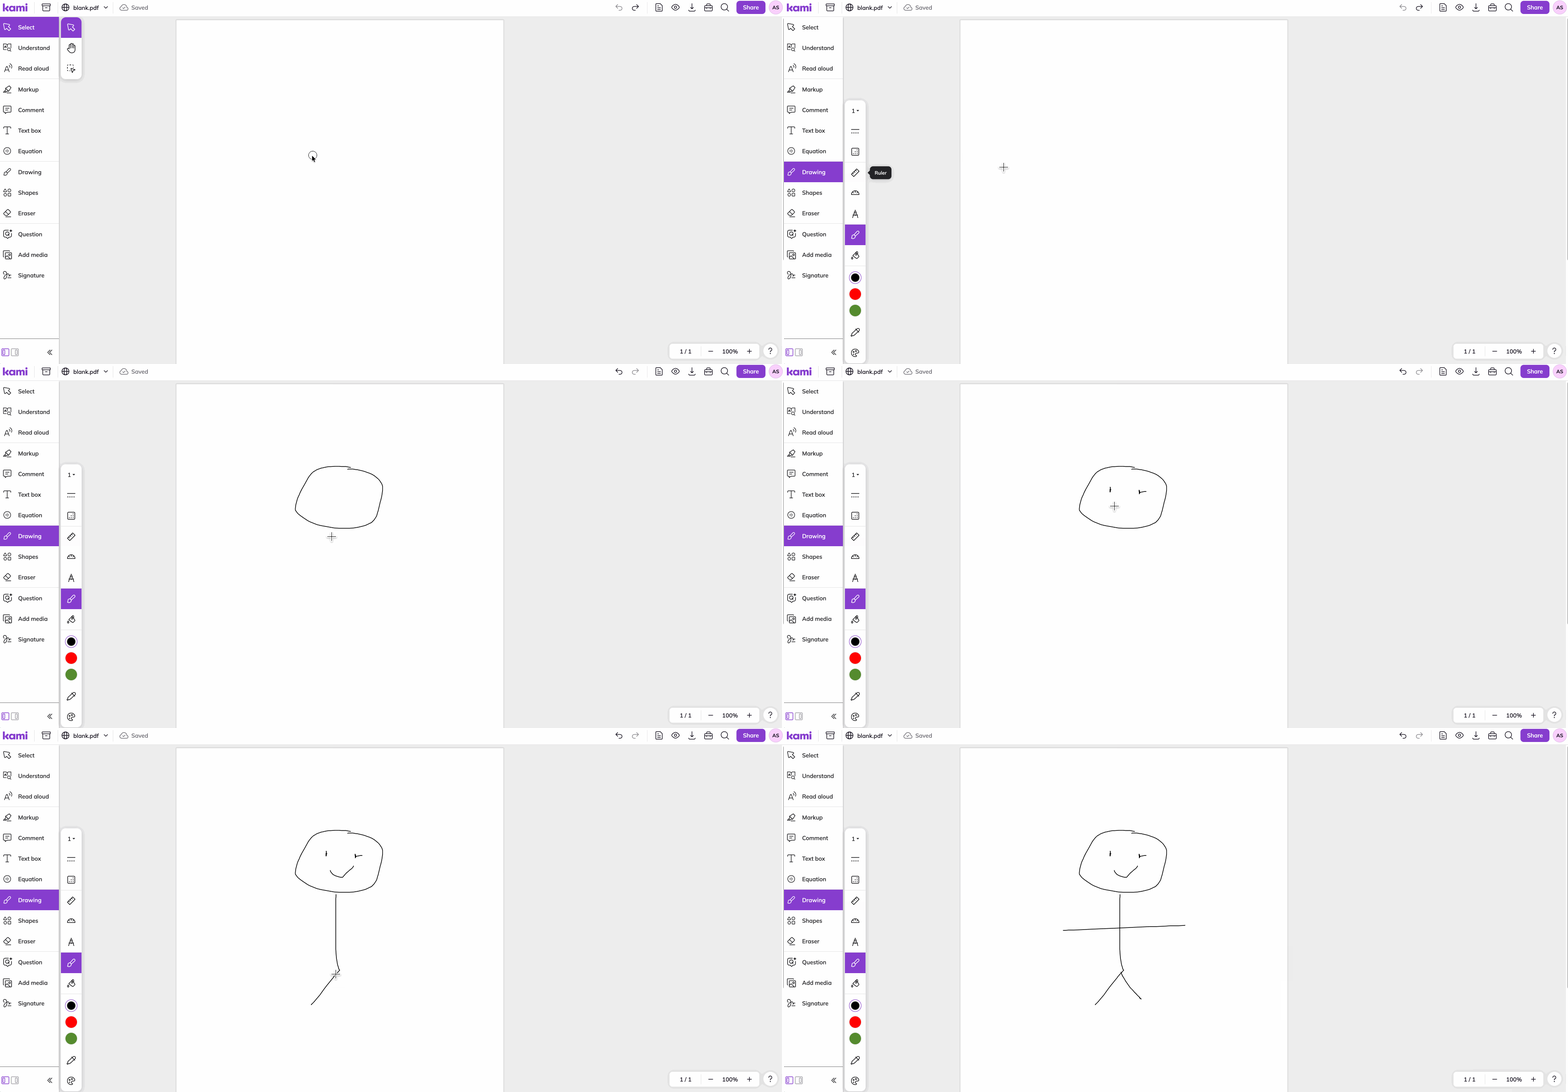
7. Drawing — This mode is enabled by default and lets you draw freely anywhere on the page. Simply click and drag on the page with your mouse, or use a stylus or your finger on touch-enabled devices. See example below.
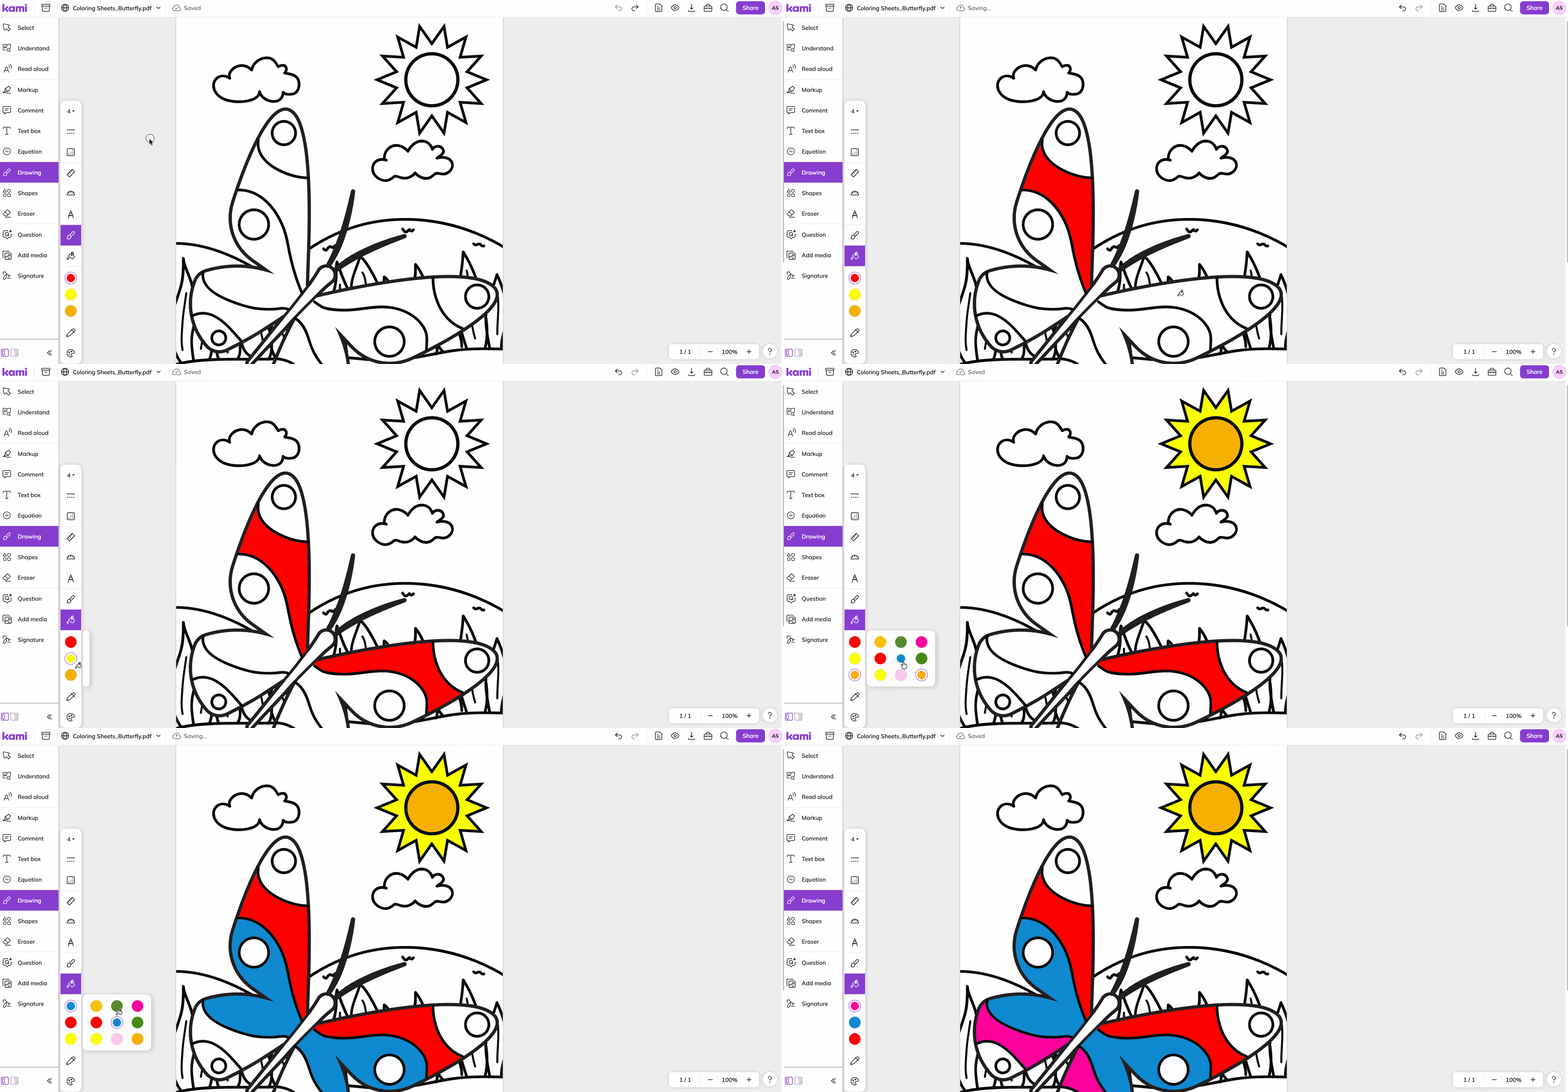
8. Paint Bucket — Click or tap a space on your page to fill it with color. The color fills the entire area up to its boundary—if there are gaps in the outline, the color fills the surrounding space. See example below.
9. Quick select color palette — Easy access to your most recently used colors.
10. Eyedropper — Select a color directly from your page to be used for changing the color of your markup annotations.
11. More Colors — Opens the full color palette to be used for changing the color of your markup annotations.
| Drawing mode: | Paint Bucket mode: |
 |
 |
Drawing assist tools
The Drawing tool includes interactive tools that constrain your strokes to mirror physical drafting tools. Learn more about how to use each below:
How to use the Ruler
1. Select the Drawing tool from the toolbar, then choose Ruler from the flyout menu.
4. To close the ruler, click the X icon found in the center of the ruler, or switch to a different tool on the toolbar.
How to use the Protractor
2. To move, click and drag near the middle of the protractor. To rotate, drag near the edges of the protractor.
3. Start drawing perfect curves and circles by clicking and dragging along the edges of the protractor. You can swap the direction of the angle measurements by clicking the flip counterclockwise icon found in the center of the protractor.
4. To close the protractor, simply switch to a different tool on the toolbar.
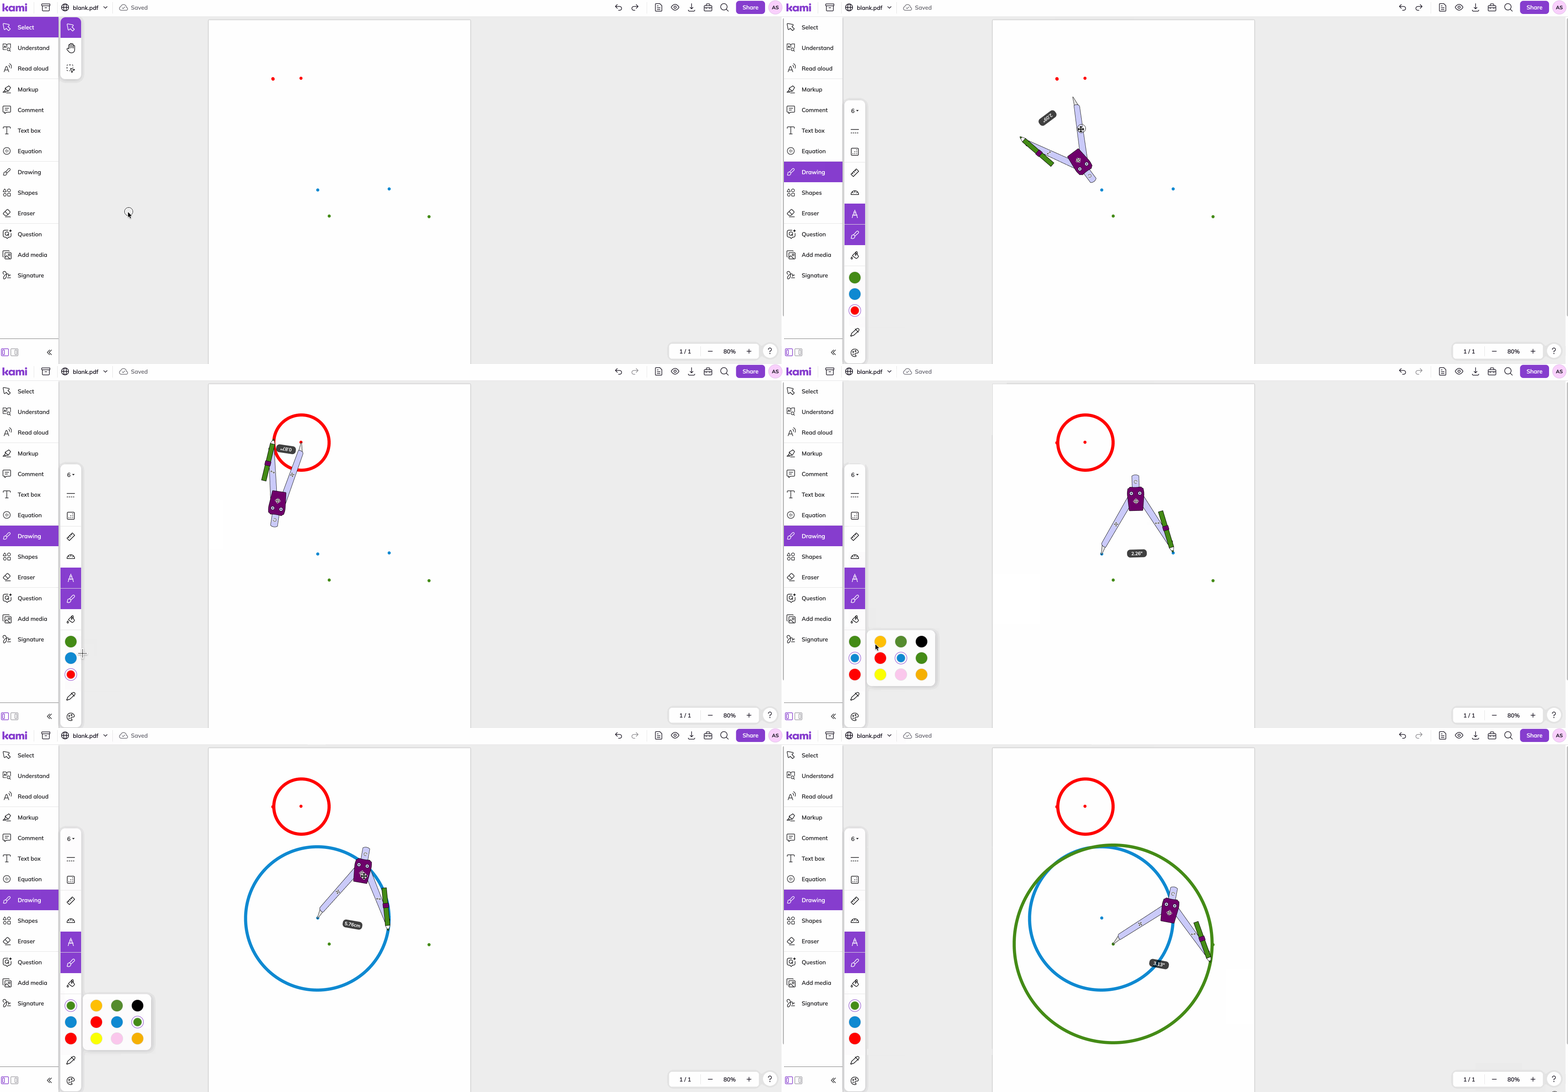
How to use the Compass
2. To move, click and drag the center part of the compass. To rotate, drag the top handle. To change the radius, drag the leg with the pencil outward or inward . Click the measurement label to toggle between inches and centimeters.
3. Start drawing perfect curves and circles by clicking and dragging the pen part of the compass in a circular motion.
4. To close the compass, simply switch to a different tool on the toolbar.