Who can use this?
✓ The Add media tool is available for Students and Teachers.
✓ Requires a Kami paid plan.
What is the Add media tool?
The Add media tool makes lessons more interactive by allowing you to add multimedia content directly into any document.
From images and videos to graphic organizers and stickers, Add media gives teachers and students creative ways to engage with learning materials.
Perfect for anyone who wants to make resources more visual, interactive, and personalized.

How to use the Add media tool
Select Add media from the Kami toolbar, then choose from the list of available options:
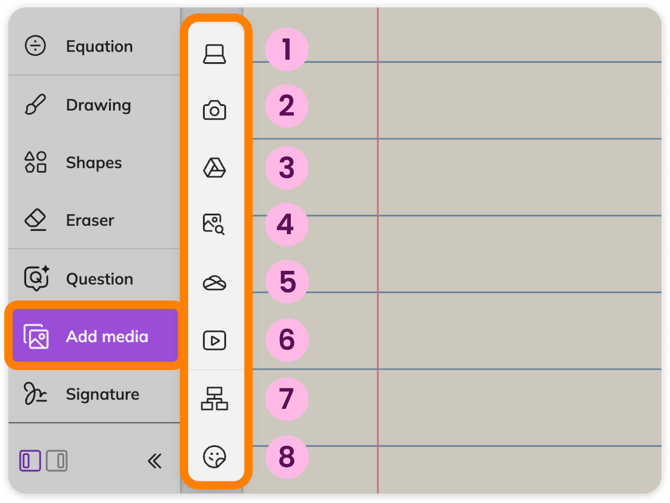
1. My Computer — Add media from your device's storage.
2. Camera — Take a picture or video using your device.
3. Google Drive — Add media from your Google Drive (must be authorized).
4. Image search — Type a word prompt and click the search button to add images to your document. Jump to this section for a detailed breakdown.
5. OneDrive — Add media from your OneDrive (must be authorized).
6. YouTube —Add videos from YouTube directly onto your page. Jump to this section for a detailed breakdown.
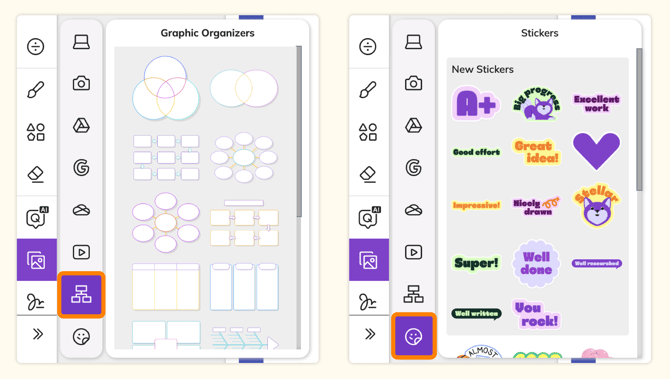
7. Graphic Organizers — Add a Graphic Organizer to your page from our library of options. Jump to this section for more information.
8. Stickers — Choose from 30+ colorful Kami stickers. Jump to this section for more information.
📝 If you've selected the Camera option, you may be prompted to grant Kami access to use your device's Camera and Microphone. This pop-up will appear in the top left of your browser.
Editing Images
After adding an image annotation to your document using the Add Media tool, selecting the image will show the tool's action bar above or below it.
In this action bar, you can choose 4 options for your image: Move, Rotate, Crop, and Image Description.

Image Search
With Image Search, you can easily find the images you're looking for and add them to your files.
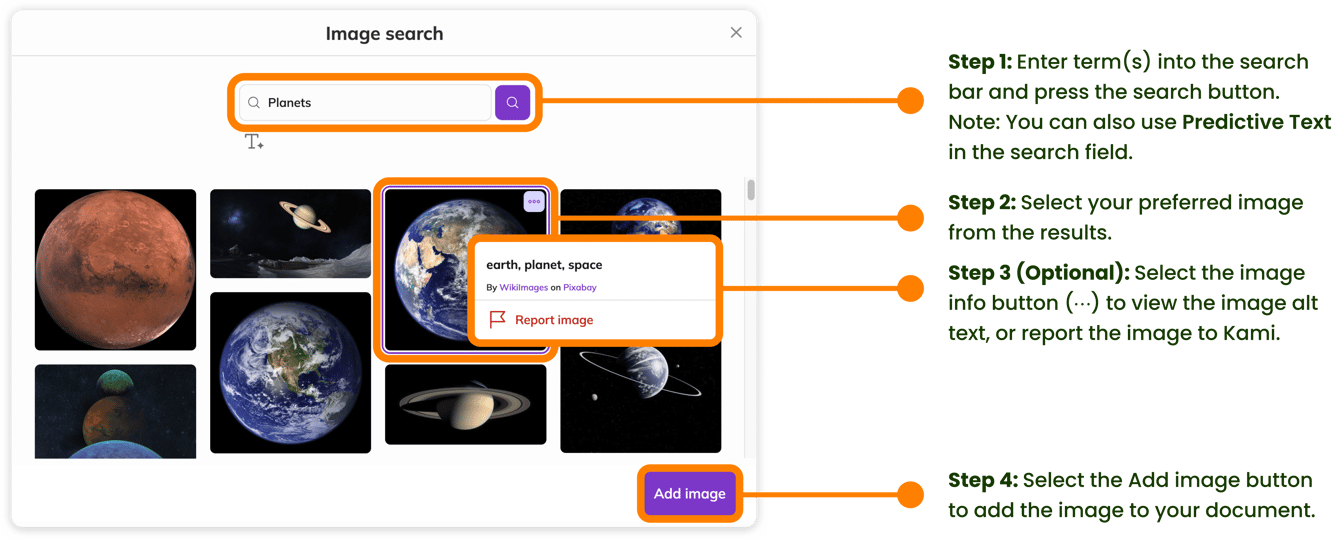
📝 Selecting the Report Image button on an image will instantly block it for all users (both students and teachers) in your domain, i.e., your school or district. It will also be sent to the Kami team for review and removal if it is deemed inappropriate.
YouTube videos

Stickers and Graphic Organizers
Selecting the Stickers or Graphic Organizers option expands to display a library, allowing you to scroll and choose what you'd like to add to your page.